Introduction

Open-source Project for a Network Data Access Protocol (OPeNDAP) provides a way for NASA users to download only the Earth data they need. This means a user can pre-select a subset of physical variables stored within a larger granule, as well as pre-specify the time range and domain range of interest within the granule, and download the data as NetCDF4 or CSV. 
Context

This tutorial demonstrates how to find OPeNDAP URLs associated with data files produced by the Surface Water Ocean Topography (SWOT) mission for the area off the coast of Washington State, as well as how to narrow down and download only mean dynamic height (ocean surface elevation) data within the granule.

Objectives

  • Locate SWOT data from Earthdata Search
  • Identify the OPeNDAP URL for the SWOT datafile (granule) for an area of interest
  • Subset SWOT data through OPeNDAP’s DAP Request Form
  • Download data in the desired data file format

Data Actions

  • Subset by variable
  • Subset by temporal range
  • Subset by spatial range
  • Download data

Procedure

Get Started

  1. Navigate to the Earthdata Search tool.
  2. Click the Log In button at the top right of the page.
  3. Enter user's Earthdata Login information.
Image
Image Caption

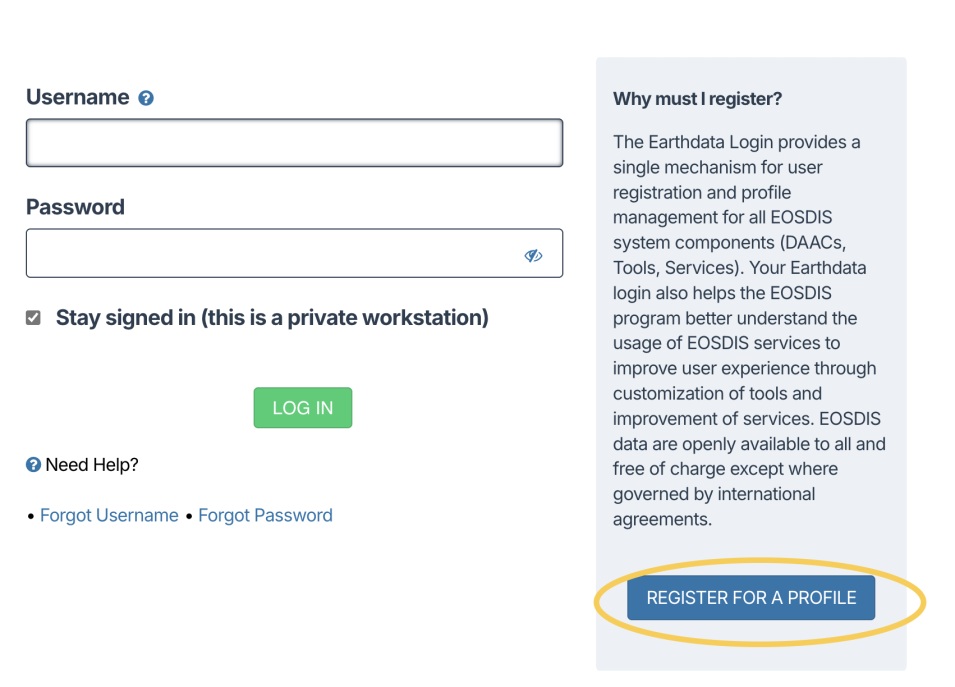
Login to your NASA Earthdata account.  If you have not yet registered for an Earthdata Login account, visit the Register for a Profile page. An Earthdata Login account is free. 

Remote video URL
A YouTube video on how to register for a free Earthdata Login.

Filter Earthdata Search

Earthdata Search provides NASA data users with a robust platform to identify relevant granules of domain-specific, Earth science geophysical data based on a defined time range and region of interest. Users filter search results using interactive features such as the spatial and temporal filters to reduce the number of specific granules for download and subsequent analysis.

  1. Beginning at Earthdata Search, enter "Mean Dynamic Topography" in the top left box; then use filters to find available related data. Select:
    • Keywords: Oceans
    • Projects: SWOT
Image
Image Caption

Using the filters mentioned in the text, locate the four different SWOT collections for Ocean dynamic topography and identify the collection identified as "SWOT Level 2 Nadir Altimeter Operational Geophysical Data Record with Waveforms."

  2. From the four available collections, select "SWOT Level 2 Nadir Altimeter Operational Geophysical Data Record with Waveforms" (SWOT_L2_NALT_OGDR_2.0, Version 2.0, doi:10.5067/SWOT-NALT-OGDR-1.0). The result will yield all available data files (granules), and will display some of the swaths (paths) where data is collected (green lines on the map).

Image
Image Caption

The selected collection has over 10,000 granules of data. Each granule covers a specific time range, and path along the orbit of the satellite. These paths are displayed in green.

 3. Using the interactive toolbar below the search box on the top left, or along the right side of the map, select the spatial filter's rectangle tool to create a rectangular region on the map. This rectangle on the map will help constrain the data to the domain of interest. The numerical values that determine the bounding box of the rectangle on the map will be displayed on the top left of the (filter) menu bar.

Note: In this example, there is no time-range filter selected, but a data user can also specify a “Temporal filter” using the drop-down option on the top left. Temporal options can also be specified manually on the “Filter Granules” menu on the left of the screen. 

Image
Image Caption

Spatial filtering (in this case using a rectangle) is achieved by selecting one of the spatial filters, indicated on this image in yellow. The values that define the box are displayed on the top left, under Spatial Filters as SW and NE pairs. 

  4.Select the Search button once your filters are selected.

Select a Granule

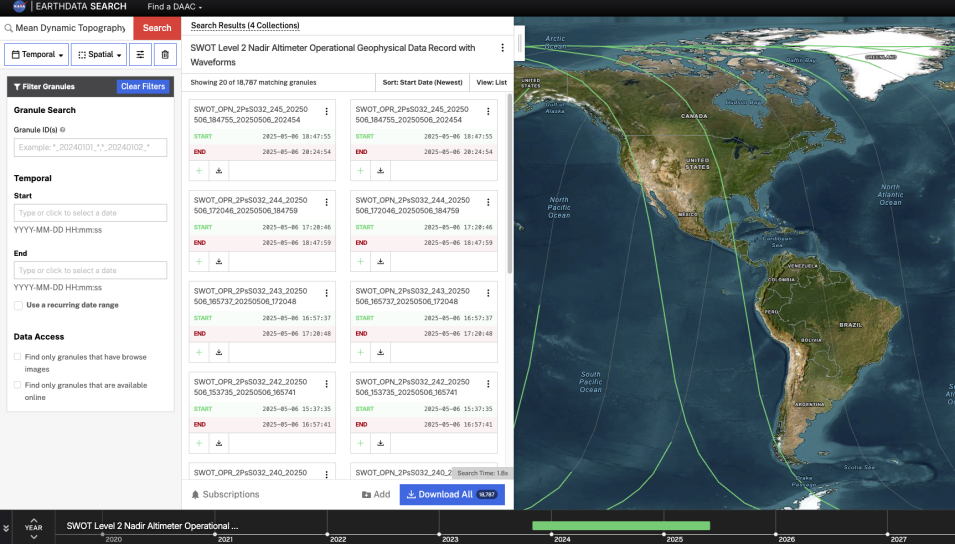
  1. A list of available granules are populated with the executed search results. Hovering over the list of granules will eventually cause one of the (gray) curves to turn green. That means that the granule the cursor is over is associated with the swath and contains data for our region of interest. 

    The yellow ellipse in the photo identifies the granule associated with the green swath, which contains data of interest for this example. The blue ellipse shows three vertical dots used for accessing additional granule information.
Image
Image Caption

A granule which contains data for the region of interest is identified. The yellow ellipse in the picture shows the granule information, while the blue ellipse highlights three vertical dots which take users to additional information about the granule. 

 2. Right click on the granule’s additional information (three vertical dots) to view additional details about the granule. 

Image
Image Caption

Additional information about the granule can be requested by selecting “view details”.
 

Identify the Granule's OPeNDAP URL

 1. Open the "View Details" screen to see the granule's details displayed as JSON text data.

Image
Image Caption

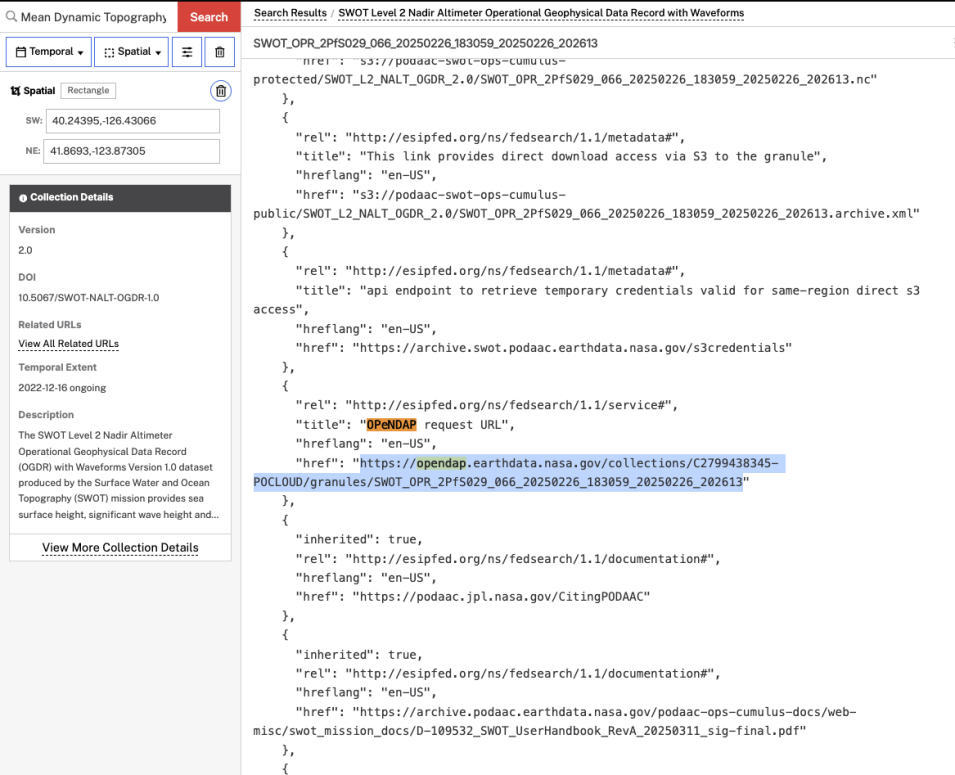
Explore the Granule's JSON text in the Earthdata Search record. 

  2. Use Control + F (or Command + F on macOS) to find "OPeNDAP" with the browser’s finder. Select the entire OPeNDAP URL. 

Image
Image Caption

Select the entire OPeNDAP URL. 

  3. Copy the OPeNDAP URL associated with the granule. The OPeNDAP url should have the following format:

https://opendap.earthdata.nasa.gov/collections/ + collection_number + /granules/ + granule_id

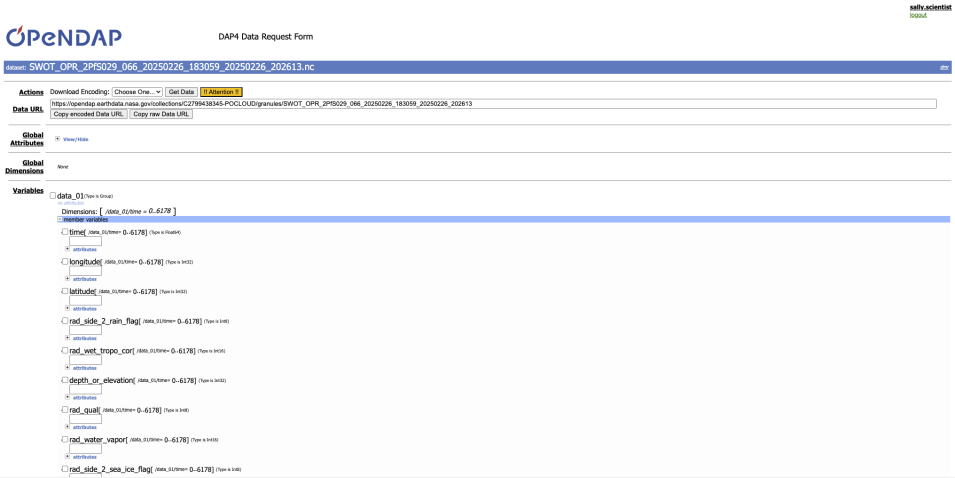
  4. Once the URL has been copied to the clipboard, paste it into your preferred browser and hit return. This should take you to the specific OPeNDAP page, DAP4 Data Request Form, associated with the individual granule.

Image
Image Caption

DAP4 Data Request Form associated with the individual granule.

Interact With the DAP Request Form

  1. Once in the DAP Request form, inspect the metadata associated with the granule, including all the variables names, types, sizes, and shapes.
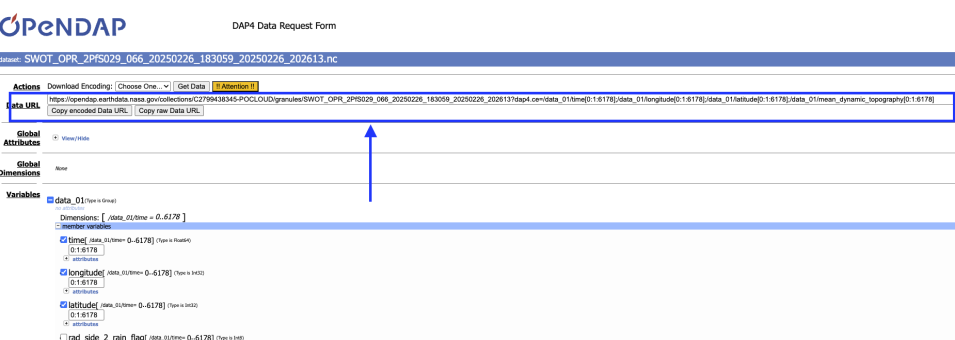
  2. Next, pre-select the variables you wish to download by selecting the checkboxes next to the variables names. You may also wish to select your subsets (index space). For example, in this case we only want four variables:
    • Time
    • Longitude
    • Latitude
    • Mean Dynamic Topography (mean_dynamic_topography)
Image
Image Caption

Time, longitude, latitude, and mean dynamic topography pre-selected for download. See blue checkmarks on boxes next to variable names.

After the relevant variables are selected, the Data URL that appears on the page, associated with the original OPeNDAP URL, contains extra information that includes listing the variables names to be retained. See blue arrow in the image below. 

Note: The DAP4 Data Request Form allows data users to interactively construct URLs that subset a remote file, starting from the initial OPeNDAP Data URL. OPeNDAP associates a URL without query parameters (anything following and including the '?' mark) with a full remote dataset, while a URL with query parameters represents a subset of that remote dataset.  

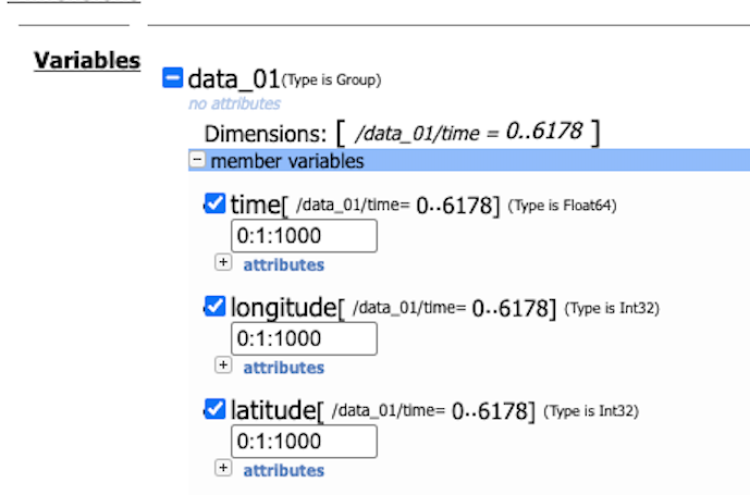
The selected granule identified with Earthdata Search has data that fall within the area of interest, but covers a wider range of latitude and longitudes. In this example, all variables are 1D arrays with length 6178 (data points). The variable's longitude, latitude, and mean dynamic topography have a single dimension, which is time. Longitude, latitude, and therefore mean dynamic topography, are all functions of time. 


Image
Image Caption

DAP4 Data Request Form, pre-selected with time, longitude, latitude, and mean dynamic topography, showing the updated DATA URL for the associated presets.

Download Data

  1. Select the desired data file format to download the data. In this example, we are interested in downloading data as NetCDF4. This is specified on the “Choose One” button to the right of “Actions.” See yellow ellipse below.
Image
Image Caption

Clicking on Get Data (yellow ellipse) triggers a local download to your workstation. In this example, the file will be a NetCDF4 containing only the time dimension array, as well as longitude, latitude, and mean dynamic topography.

2.  Download Data by clicking on the “Get Data” button.

Download a Domain Subset

It is possible that only the first 1,000 values of a time series will produce latitude and longitude values that fall within the selected domain or area of interest. This means that from the range of possible times, only the first 1,000 indexes are relevant to our study. The data user can pre-select only those values, further restricting the total size of the download file. 

Using the DAP Request Form, data users can specify a spatio-temporal subset, via index slices, effectively requesting only a smaller part of the entire data range.

Image
Image Caption

Close up of the DAP Request Form: Spatio-Temporal Subsetting with Index Slices

The DAP request form allows data users to narrow down a subset by time or space, and thus download a more focused subset of the larger dataset. This can significantly speed up download time, and effectively further reduce the size of the file on the data user’s workstation. 

Lastly, given an OPeNDAP URL, most of the spatio-temporal subsetting (and subsetting by variable name) and download can be performed via python tools such as pydap and xarray. These tools essentially perform the last steps and trigger download of the parts of the data you need. 

Python tools are not for beginners, since installing them and using them correctly requires some minimal programming requirements and experience. Lastly, aggregation of multiple files can be done with xarray once a user has a collection of URLs. However, these steps also require some experience from the data user perspective.

Resources

OPeNDAP

Xarray

References

  • Data Citation:
  • OPeNDAP Citation:
    • Data were accessed using the Hyrax data server, version 4,  running at location.

Details

Last Updated

Sept. 10, 2025

Published

Sept. 10, 2025